Canvas Overlay
Blue Marble displays the template directly on the canvas, eliminating the need for extra alignment.
Blue Marble is a template tool designed for wplace.live. It shows you where to place pixels to create an imported image.
"The ultimate tool for pixel placement."
Blue Marble is a template tool for wplace.live. It shows you where to place pixels to create an imported image.
Blue Marble displays the template directly on the canvas, eliminating the need for extra alignment.
Track the number of correctly and incorrectly placed pixels in real-time.
The entire codebase of Blue Marble (even this website!) is open source for anyone to contribute, ensuring security and high performance.
With Blue Marble being used by over 20,000 users simultaneously, collaborating on pixel projects becomes incredibly easy.
Select your browser below for optimized installation instructions. Blue Marble works best with Chromium-based browsers but supports all major browsers.
Install Blue Marble Canvas Overlay on Chrome Browser - Complete Guide
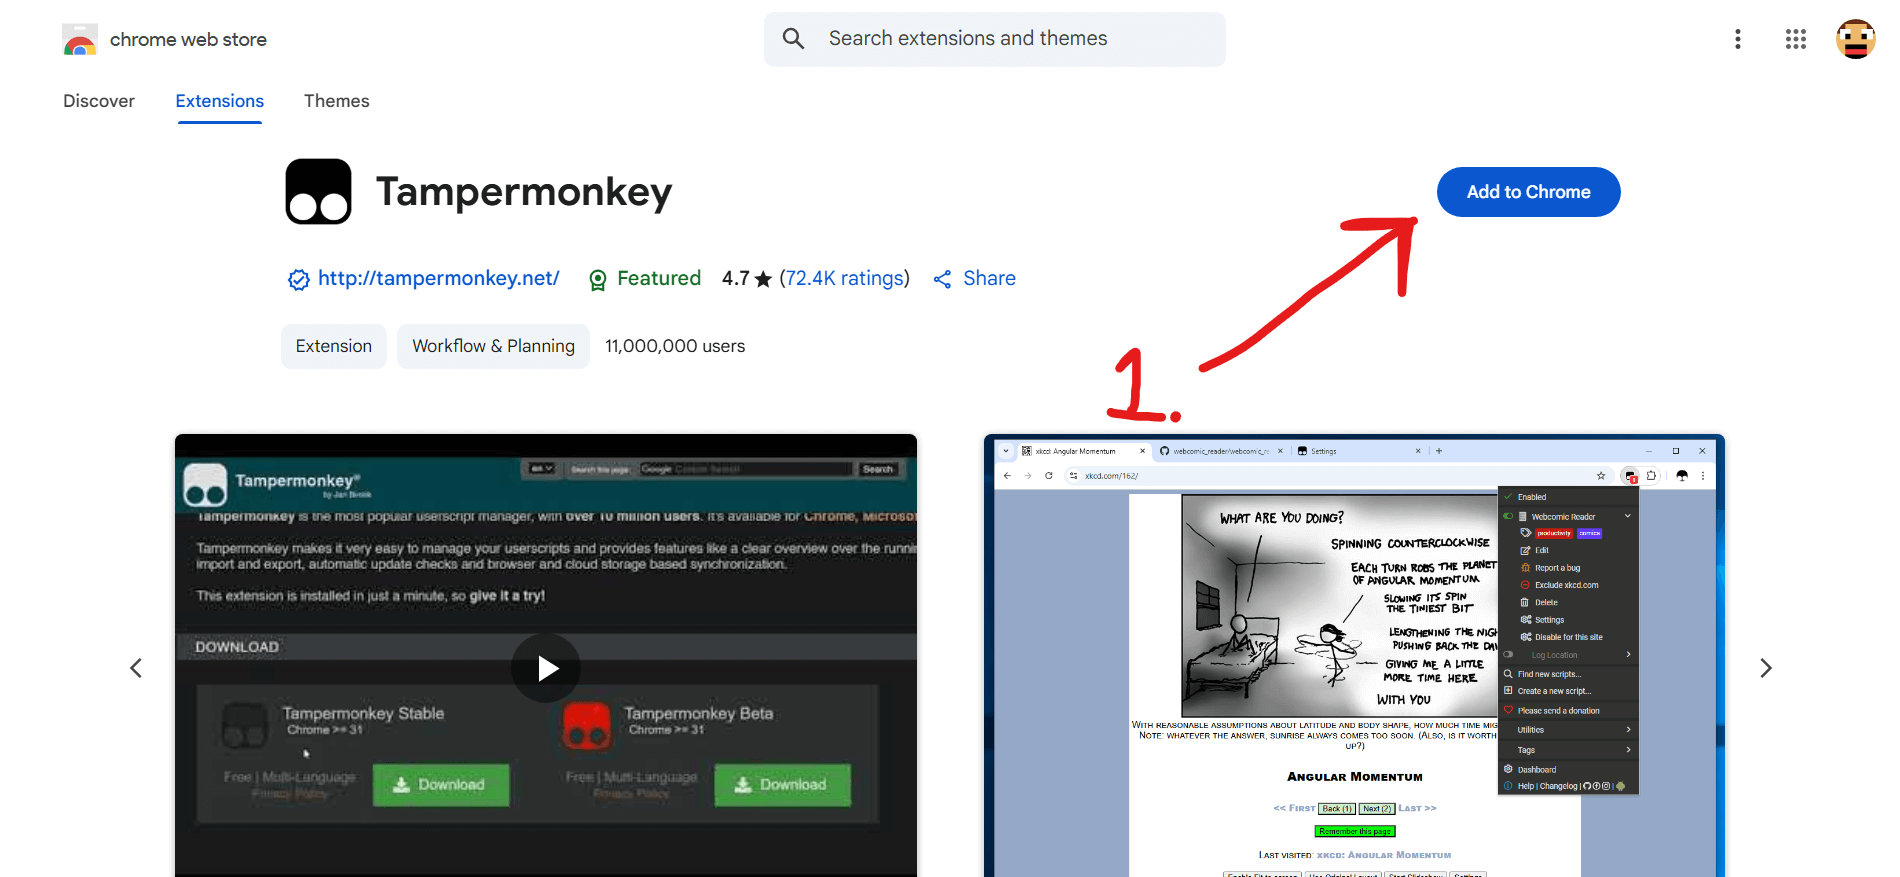
Add the official TamperMonkey userscript manager from Chrome Web Store
💡 Click 'Add to Chrome' button and confirm installation
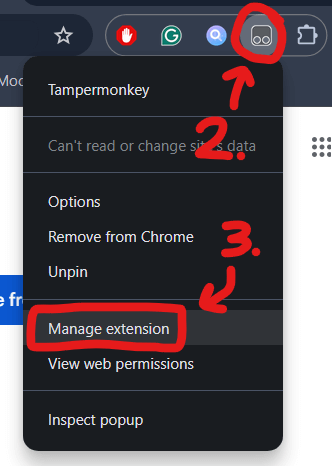
Right-click TamperMonkey icon → Select 'Manage Extensions'
💡 Access extension management panel for permission setup
Left-click on the TamperMonkey icon to access the extension management panel.
💡 Access extension management panel for permission setup
Toggle 'Developer Mode' switch in top-right corner
💡 This allows advanced userscript functionality for Blue Marble
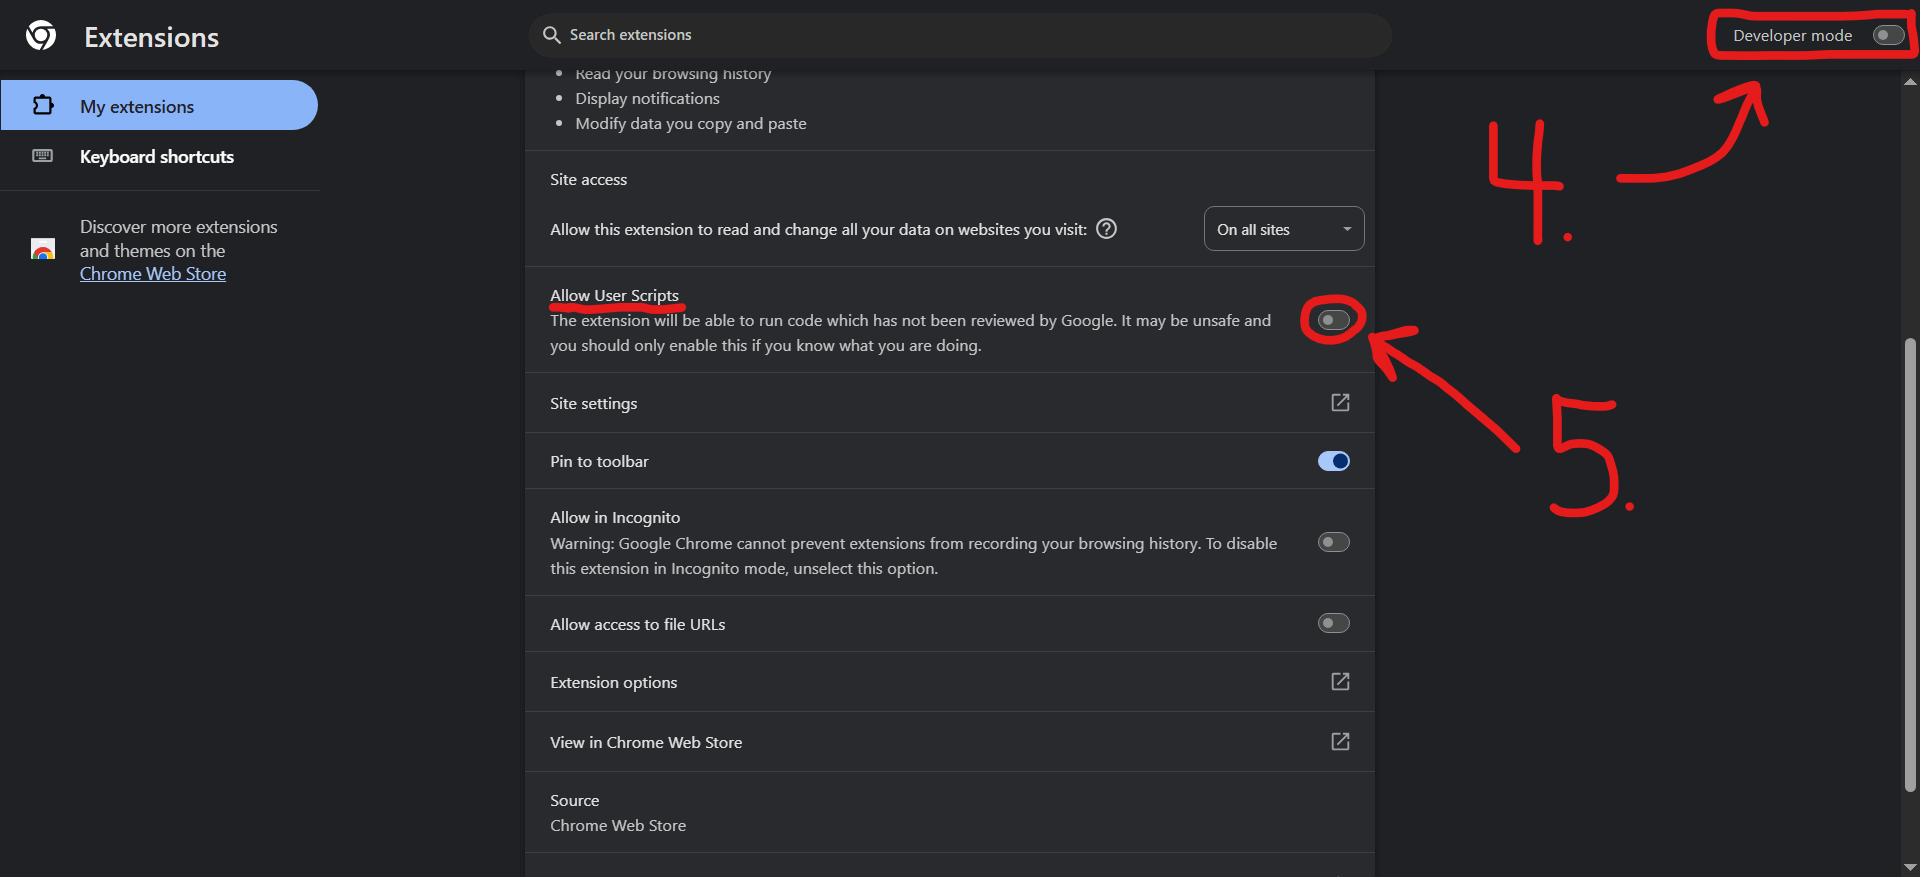
Enable 'Allow access to file URLs' and site access permissions
💡 Essential for Blue Marble canvas overlay functionality

Click the link to automatically install the Blue Marble userscript
💡 TamperMonkey will prompt you to install - click 'Install' to complete
Check that Blue Marble interface appears on wplace.live canvas
💡 You should see overlay controls and coordinate system
Blue Marble will display your template in the same size. If your image is 500 pixels high and 300 pixels wide, the template will also be 500 pixels high and 300 pixels wide. Here are the instructions for displaying the template image on the canvas:

Find the pixel in the upper left corner. Fill in Tl X, Tl Y, Px X, and Px Y with its coordinates. You can use the "pin" icon to automatically fill in the coordinates after clicking on the pixel.
Create Image: We recommend using the Wplace Color Converter to create your template. For clear transparent pixels, you need to use the #deface HEX color.
Upload the image in PNG or WEBP format.
Click the "Create" button.
If your template is still not displayed, try clicking the "Enable" button.